You’re on a roll. You can log-in, navigate the Dashboard,and you’ve started posting. But a picture tells a thousand words so let’s get some images into our posts.
Click on Upload/insert or click the add media symbol which looks like this:
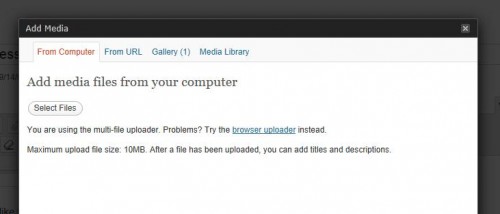
A new screen will pop-up which looks like this:
Click on “Select Files”
You can now select which images you want to upload from your computer. You can also link to files from other websites using “From URL” tabs, or you can select from previous uploaded images from “Media Library”.
You can now select how you want the image to appear in the post by selecting position, size, editing the image, and adding captions. Once you’re ready click the “Insert into Post” button
Images can be edited later using the Media tab on the Dashboard or by clicking on an image in a post and selecting the “Edit Image” symbol, shown below.


Hi John
Cheers for the posts. I used to use a lot of screenshots for images for the site but Mike C has chastised me and told me to label the file names with a descriptive name and add in some other descriptors so that google can find it. It seems the LITFL ECGs have that done as the top hit on google images for lots of ECG findings is LITFL.
That’s a really good point Andy. I’m still trying to get my head around the SEO aspect of this web thing and suspect I’m going to have to spend some time going back and editing some of the picture file names for maximum search engine love.